Live energy usage on your own display
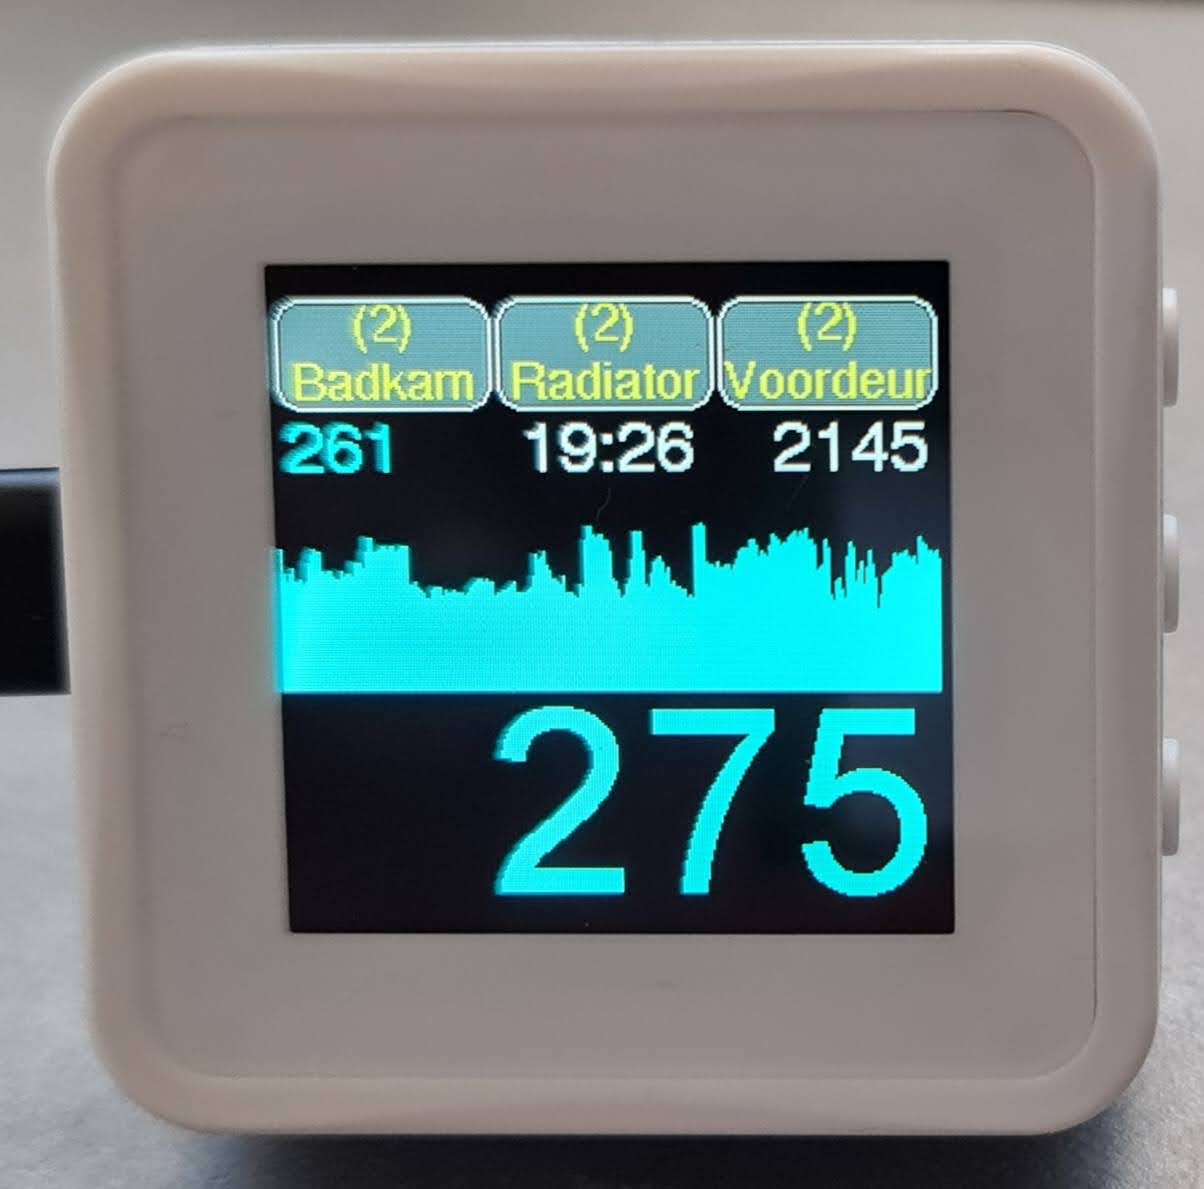
Connect a small ESP32 module wirelessly to your smart meter via the HomeWizard P1 meter (and optionally control Energy Sockets) — no cloud, no subscription.
Live usage
View your electricity consumption and solar energy generation directly from your digital meter via WiFi.
Smart sockets
Enable Energy Sockets automatically — if desired — when there is sufficient sunlight, adjustable per second.
100% local
Works even if HomeWizard's servers or your internet go down — only your home WiFi is needed.
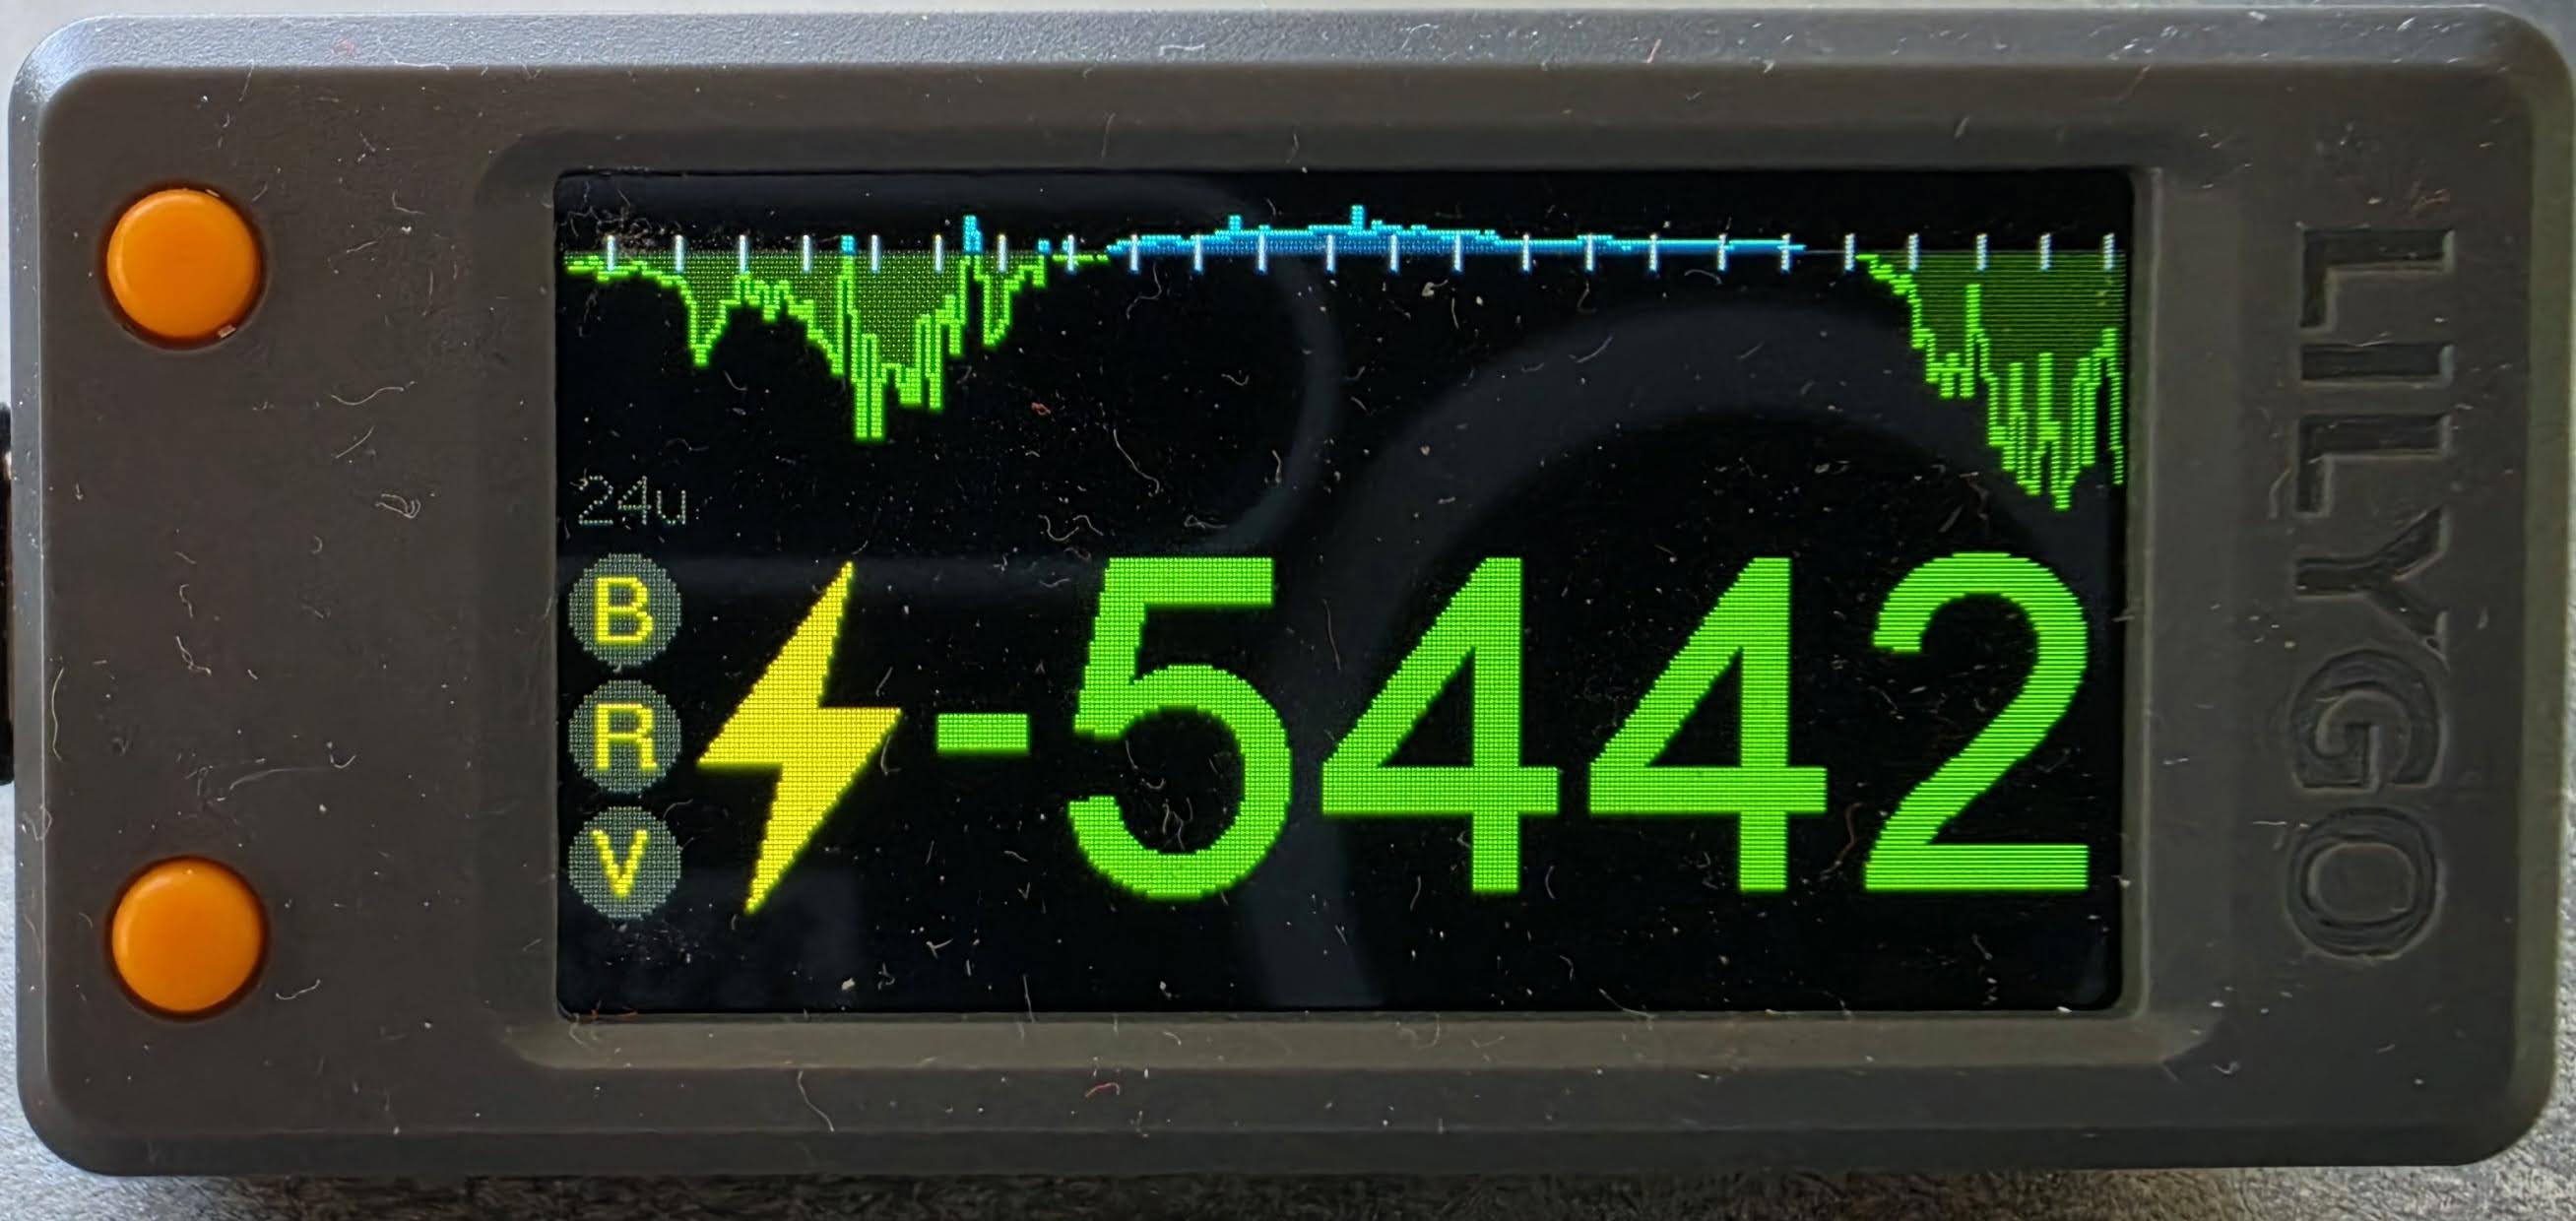
What does the screen show?
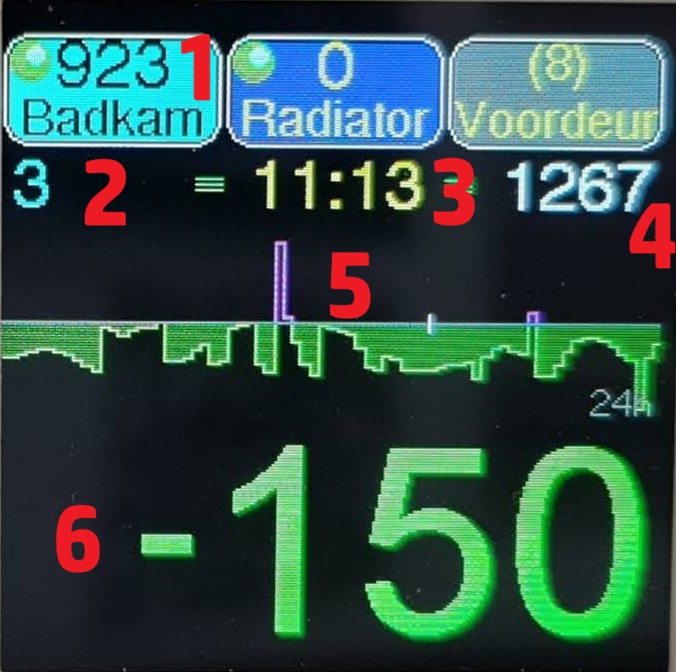
- Socket — name of the socket (see colour legend below)
- Projected quarter-hour peak — expected peak if current consumption continues
- Current time - yellow = daytime rate, green = nighttime rate
- Highest monthly peak — the highest quarter-hour peak recorded this month
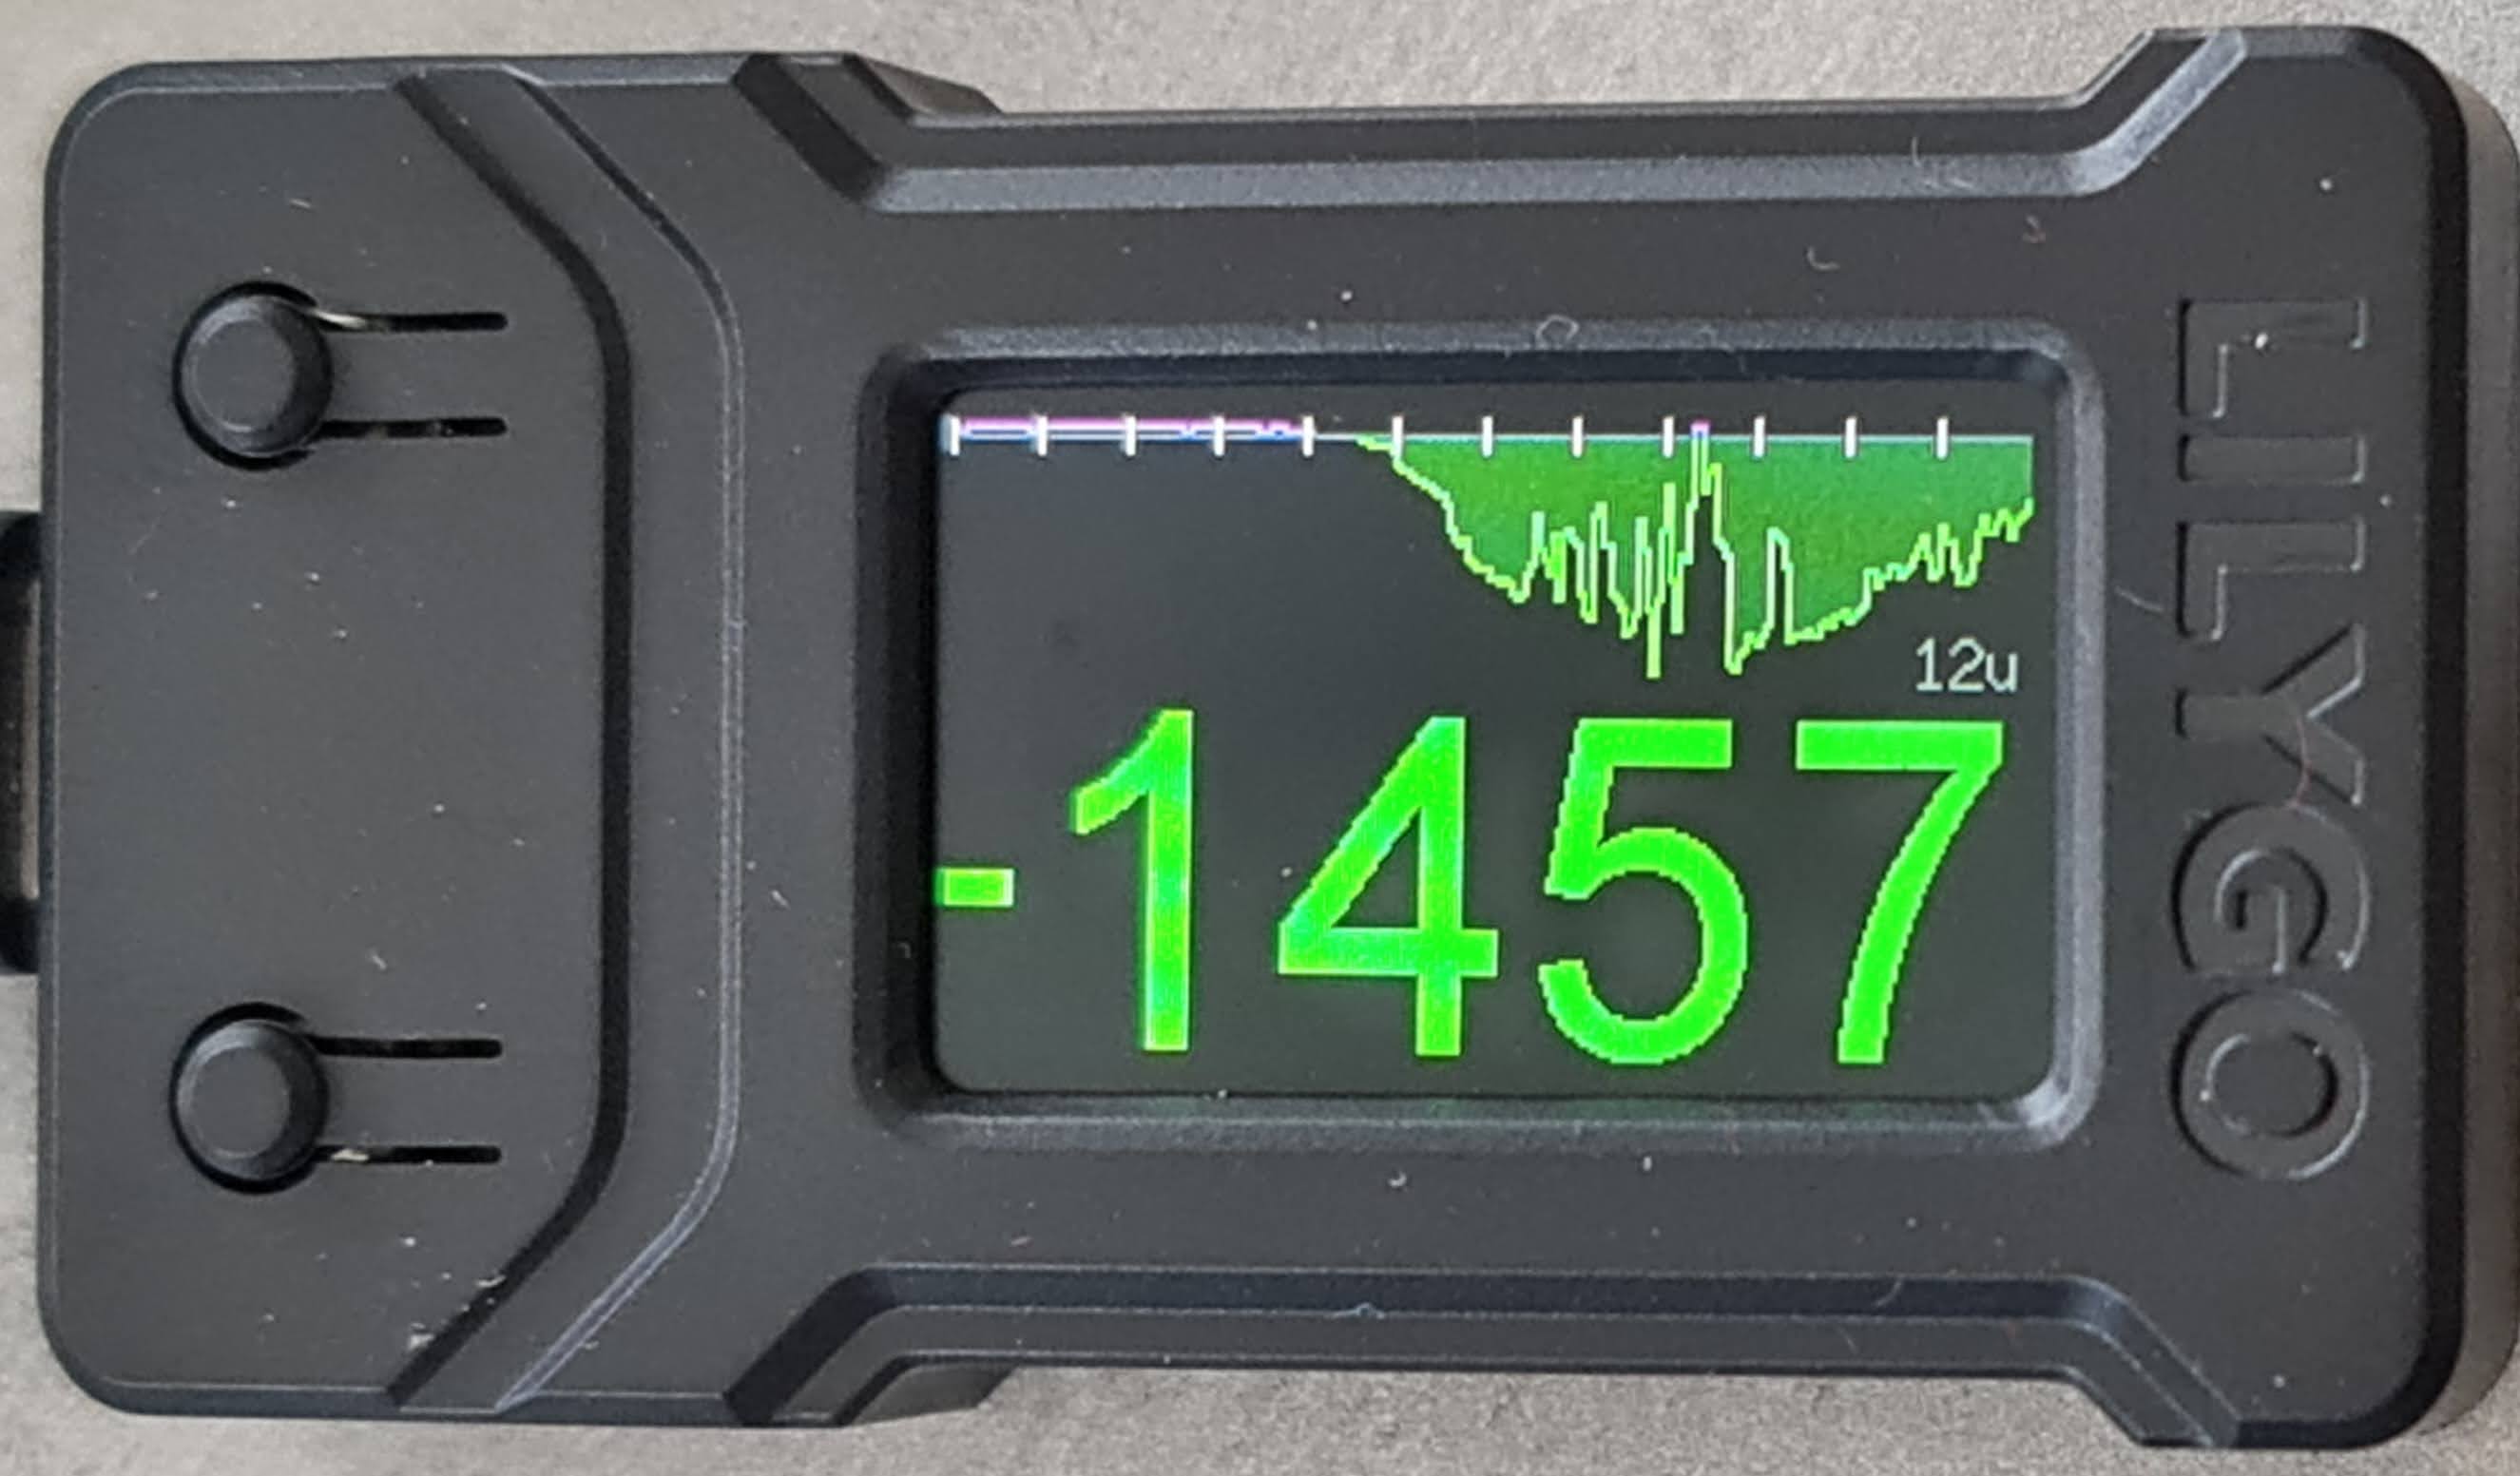
- Chart area — historical consumption and feed-in over time
- Current consumption or surplus — in watts; negative = feeding back to the grid
🎨 Socket colour legend and icons
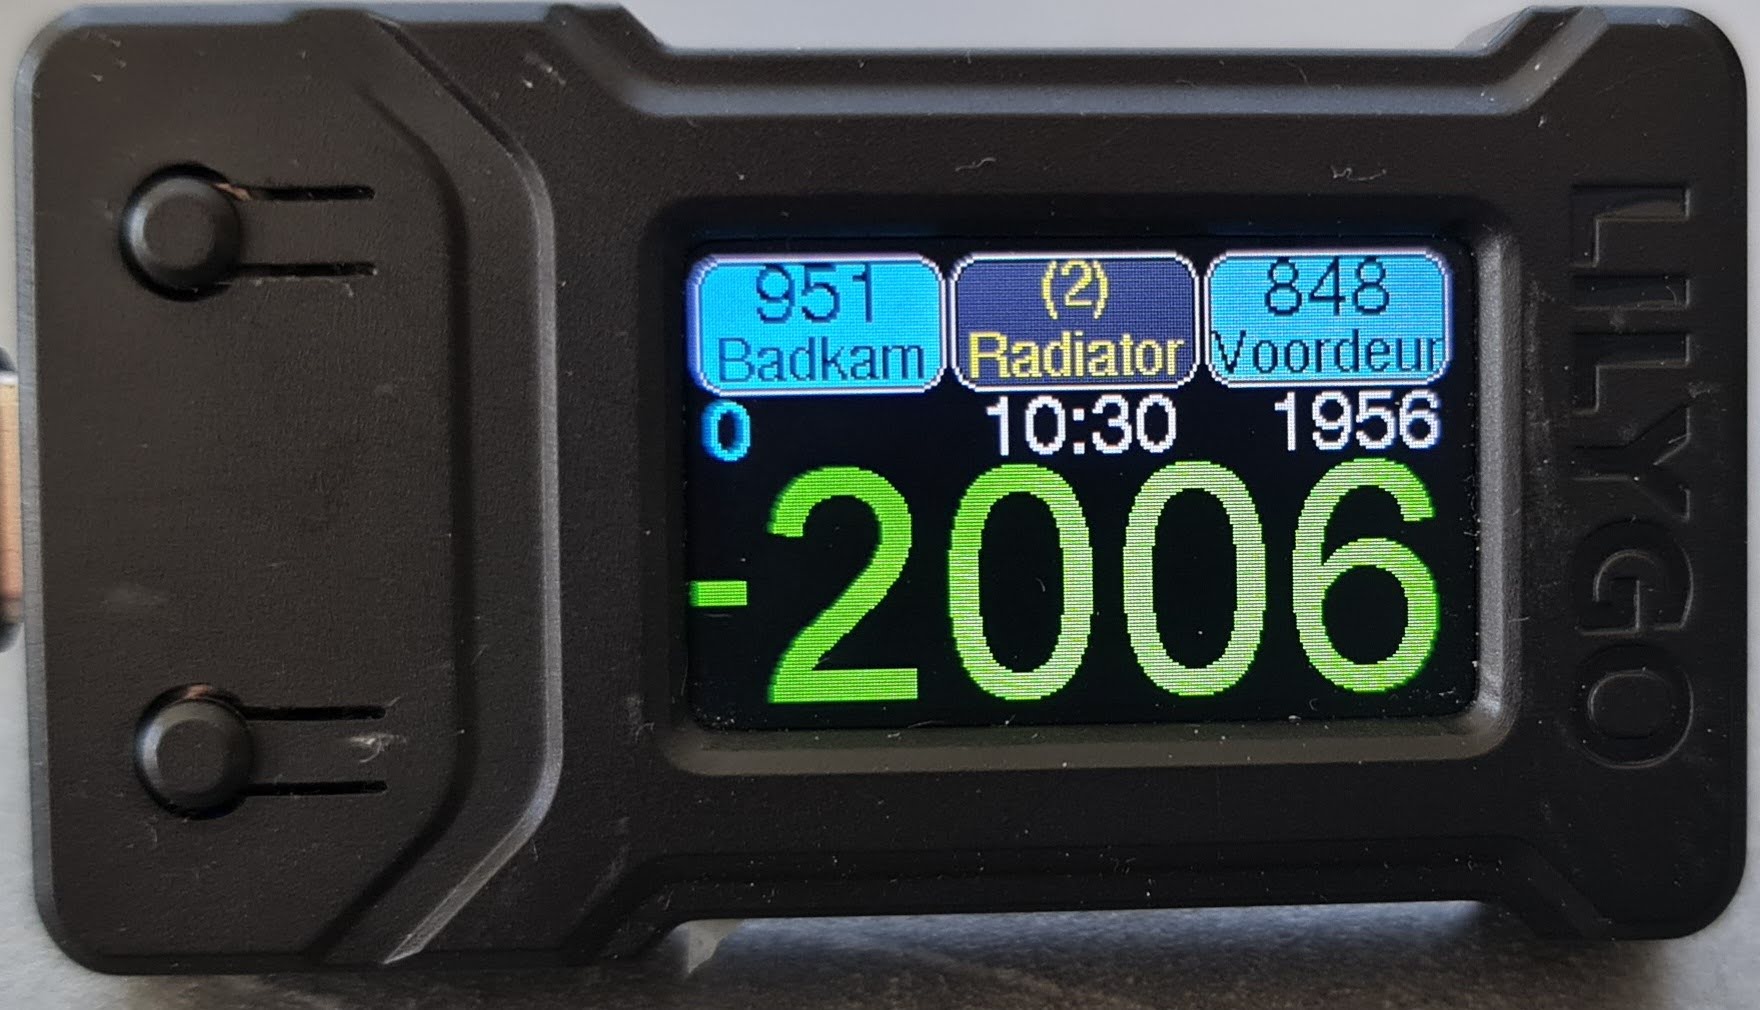
- Sockets light blue: active (shows consumption per socket)
- Sockets dark blue: active but no consumption (e.g. thermostat on device switches off)
- Sockets grey: socket is off (shows switch-off delay in seconds)
- Green dots (and green lines): sockets can be switched
- Lightning icon: yellow = day rate, green = night rate

What do you need?
- Lilygo T-Display (choose the unsoldered version with enclosure — 4 MB or 16 MB, both work) — or for a larger screen: Lilygo T-Display S3 (with enclosure) — or compact with enclosure: Waveshare ESP32-S3 1.54" LCD (240×240, built-in enclosure)
- USB-C data cable (data-capable, not charge-only — e.g. from bol.com)
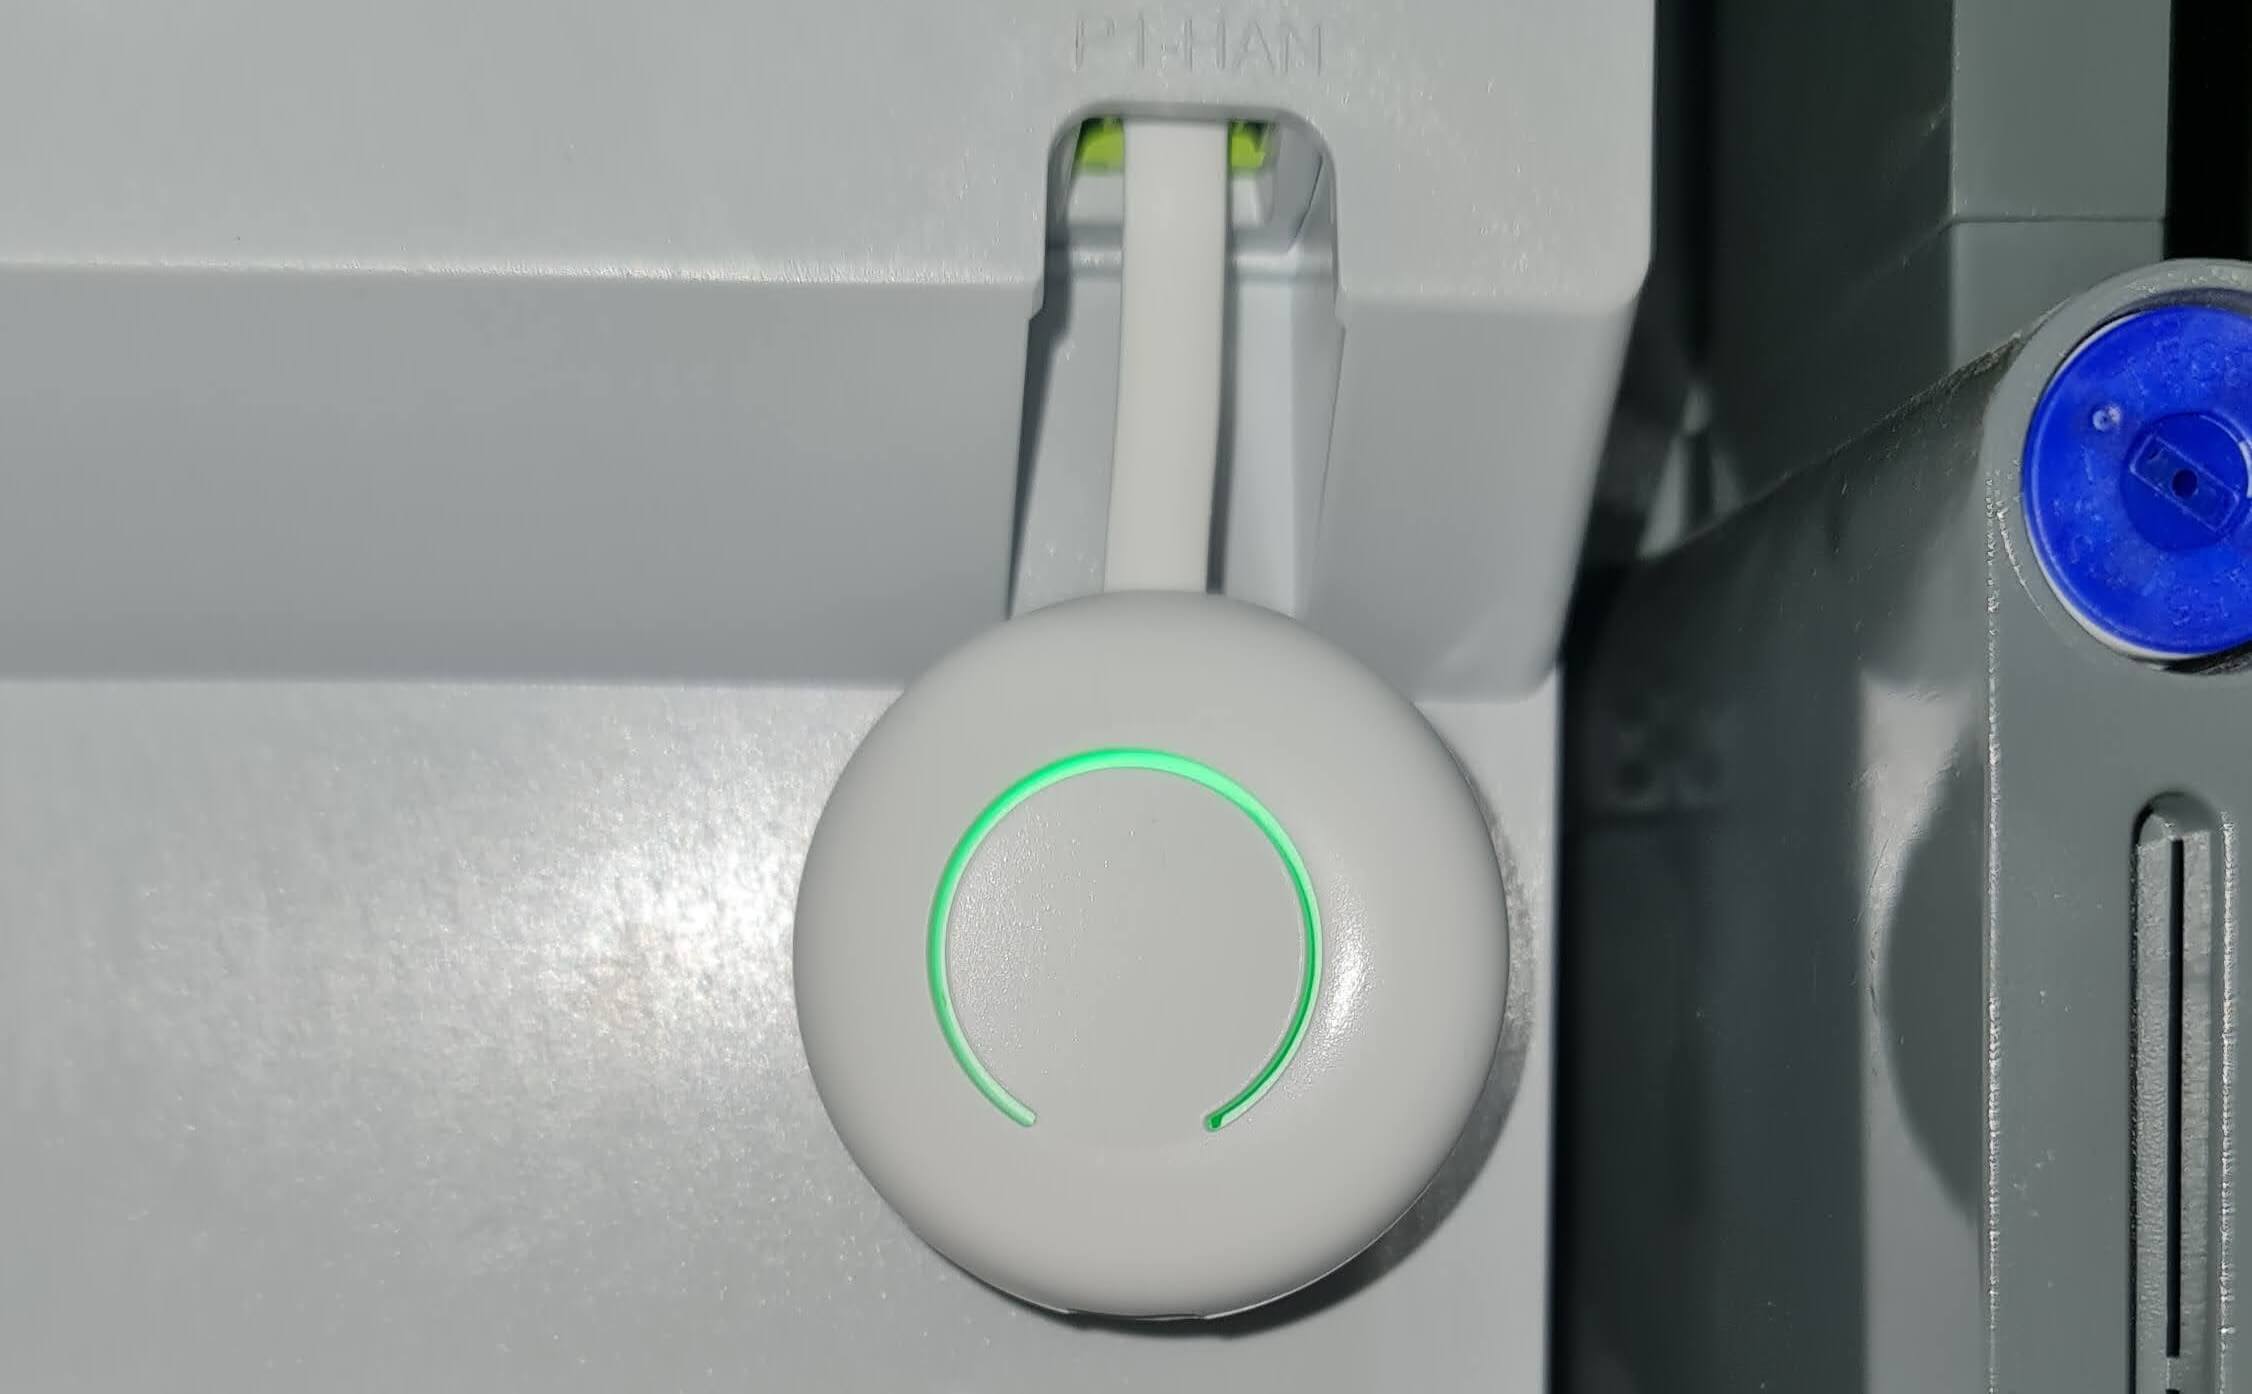
- HomeWizard P1 meter — puts your smart meter data on WiFi
- HomeWizard Energy Sockets (optional, for automatic switching)
- WiFi network with coverage near the meter cupboard
Physical installation
- Plug the HomeWizard P1 meter into the smart meter and follow HomeWizard's instructions.
- (Optional) Plug the HomeWizard Energy Sockets into a wall outlet and follow HomeWizard's instructions.
Enable the local API
Open the HomeWizard app and go to Settings → Devices → P1 Meter. Enable the local API at the bottom. Without this, the module cannot retrieve data.
(Optional) Repeat this for any sockets you want to switch or monitor with the module.
Put the firmware on the board
First download the correct file for your board:
▸ LilyGo T-Display / T-Display S3 — How do I flash this? (step-by-step)
You need no software — this is done directly from your browser (Chrome, Edge or Opera) using espflash.app.
-
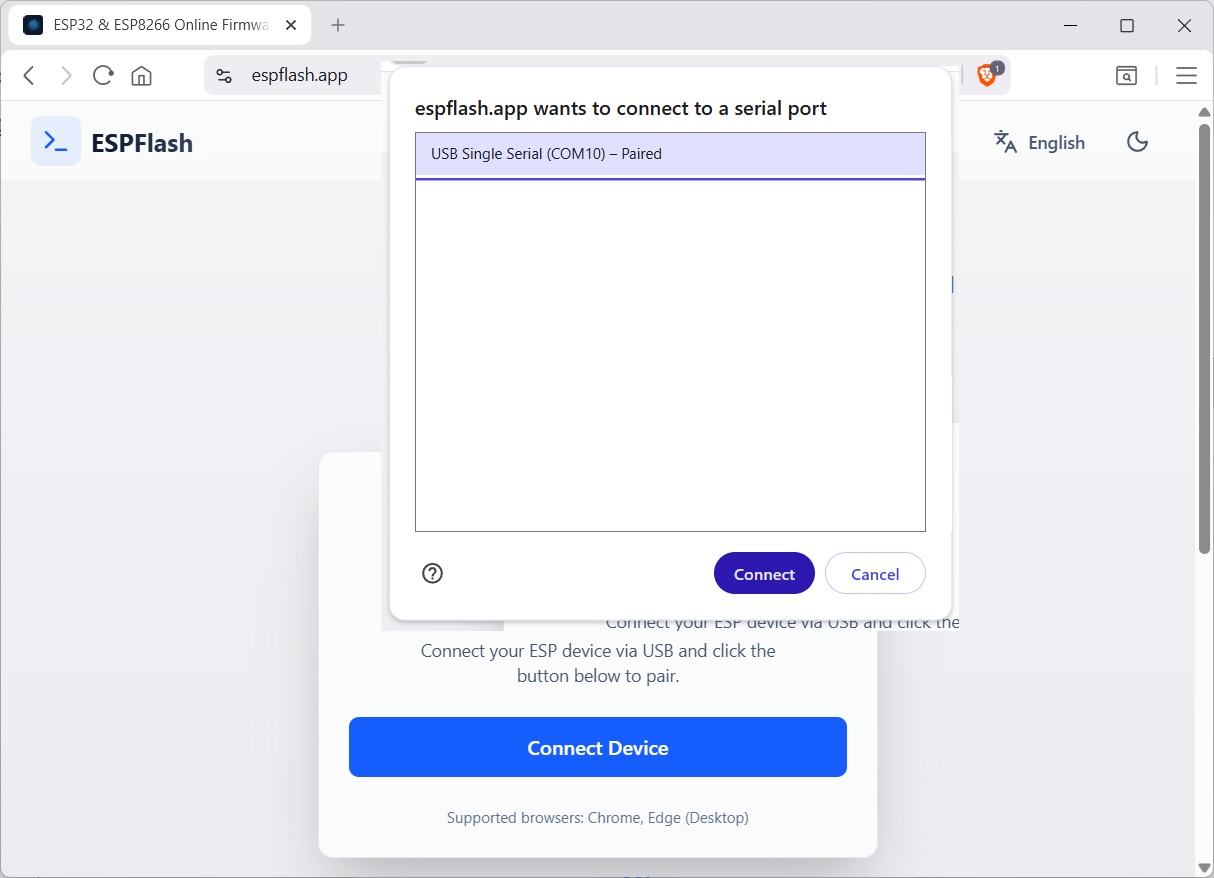
Open the flash tool in your browser
Go to espflash.app, connect your board via the USB data cable and click "Connect Device". Select the correct port in the pop-up.
-
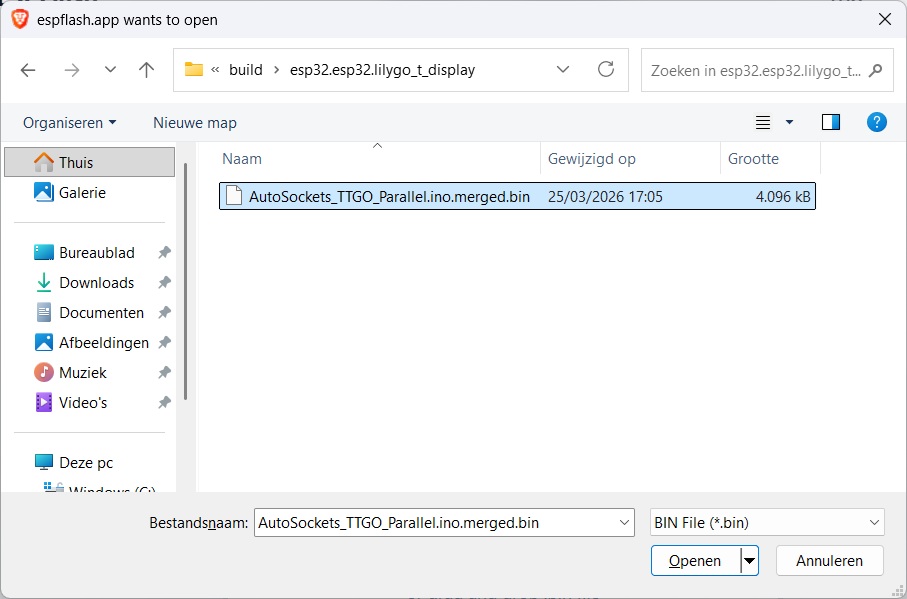
Choose the firmware file
Click "Click to upload firmware" and select the .bin file you downloaded above.

-
Start flashing
Click "Start Flashing" and wait patiently. Do not disconnect the USB cable during this process (takes a few minutes).

-
Done!
You will see "Done!" or "Flash successful". Unplug and reconnect the cable — the board starts up with the new firmware.

- No COM port visible? Install the USB driver (CP210x or CH340).
- Process stalls? Hold the BOOT button while clicking "Program".
- Still not working? Try a different USB cable or USB port.
▸ Waveshare ESP32-S3 1.54" — How do I flash this? (step-by-step)
The Waveshare ESP32-S3 uses native USB and works best with esptool-js (also directly in the browser, no installation needed).
-
Open the flash tool
Go to espressif.github.io/esptool-js in Chrome, Edge or Opera. Connect your Waveshare board via the USB data cable.
-
Connect to the board
Click "Connect" and select the correct port in the pop-up (e.g. "USB JTAG/serial debug unit").
-
Configure the flash settings
Set the flash address to
0x0or just zero0Click "Choose File" and select theAutosockets_154_T.ino.merged.binfile you downloaded above.
If a second file row is visible, click "Remove" to delete it.
Also set: Flash Mode:keep— Flash Frequency:keep— Flash Size:16 MB. -
Start flashing
Click "Program" and wait patiently. Do not disconnect the USB cable during this process. You'll still have to wait even after “100%.” Once everything is finished, you'll see another notification, and then you can restart the device.
-
Done!
You will see "Leaving... Hash of data verified." at the bottom. Unplug and reconnect the cable — the board starts up with the new firmware.
- No port visible? Use Chrome, Edge or Opera — Firefox does not support WebSerial.
- Process stalls? Hold BOOT, briefly press RESET and release BOOT. Then click "Program" again.
- Still not working? Try a different USB cable or USB port.
🔧 Advanced users: source code and Arduino IDE
Want to modify or compile the code yourself? Request the source code at johanok@gmail.com. This approach only makes sense if you are familiar with Arduino and library management.
First-time configuration
Power on the board by connecting it to a power source. If it cannot connect to WiFi, it opens its own wireless access point (Lily, no password required).
- Turn off mobile data on your smartphone and connect to the
Lilynetwork. - Open your browser at
192.168.4.1. - Enter only your WiFi credentials (SSID and password) — the board will then automatically scan your network for HomeWizard devices, save them, and restart.
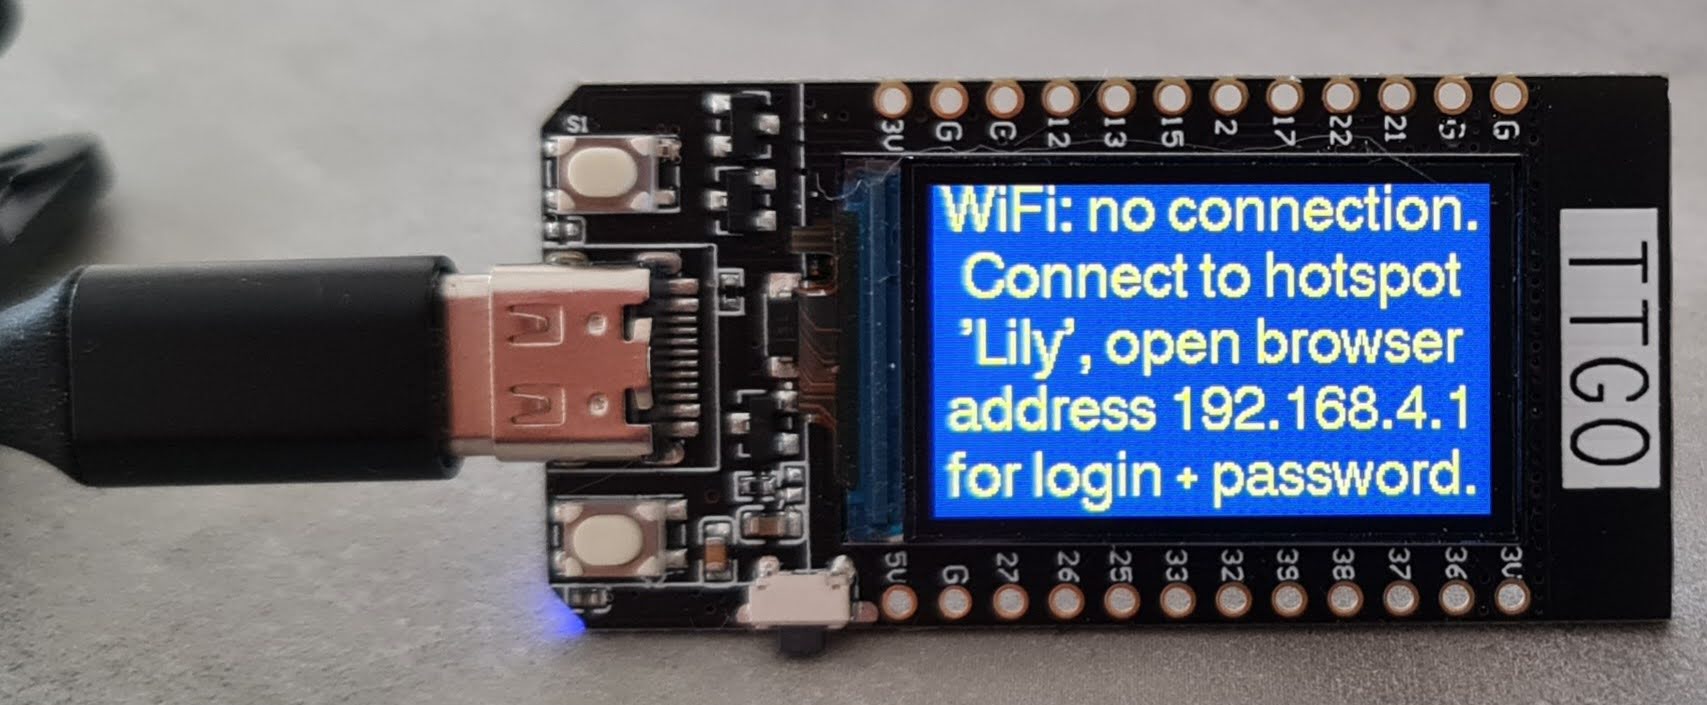
192.168.4.1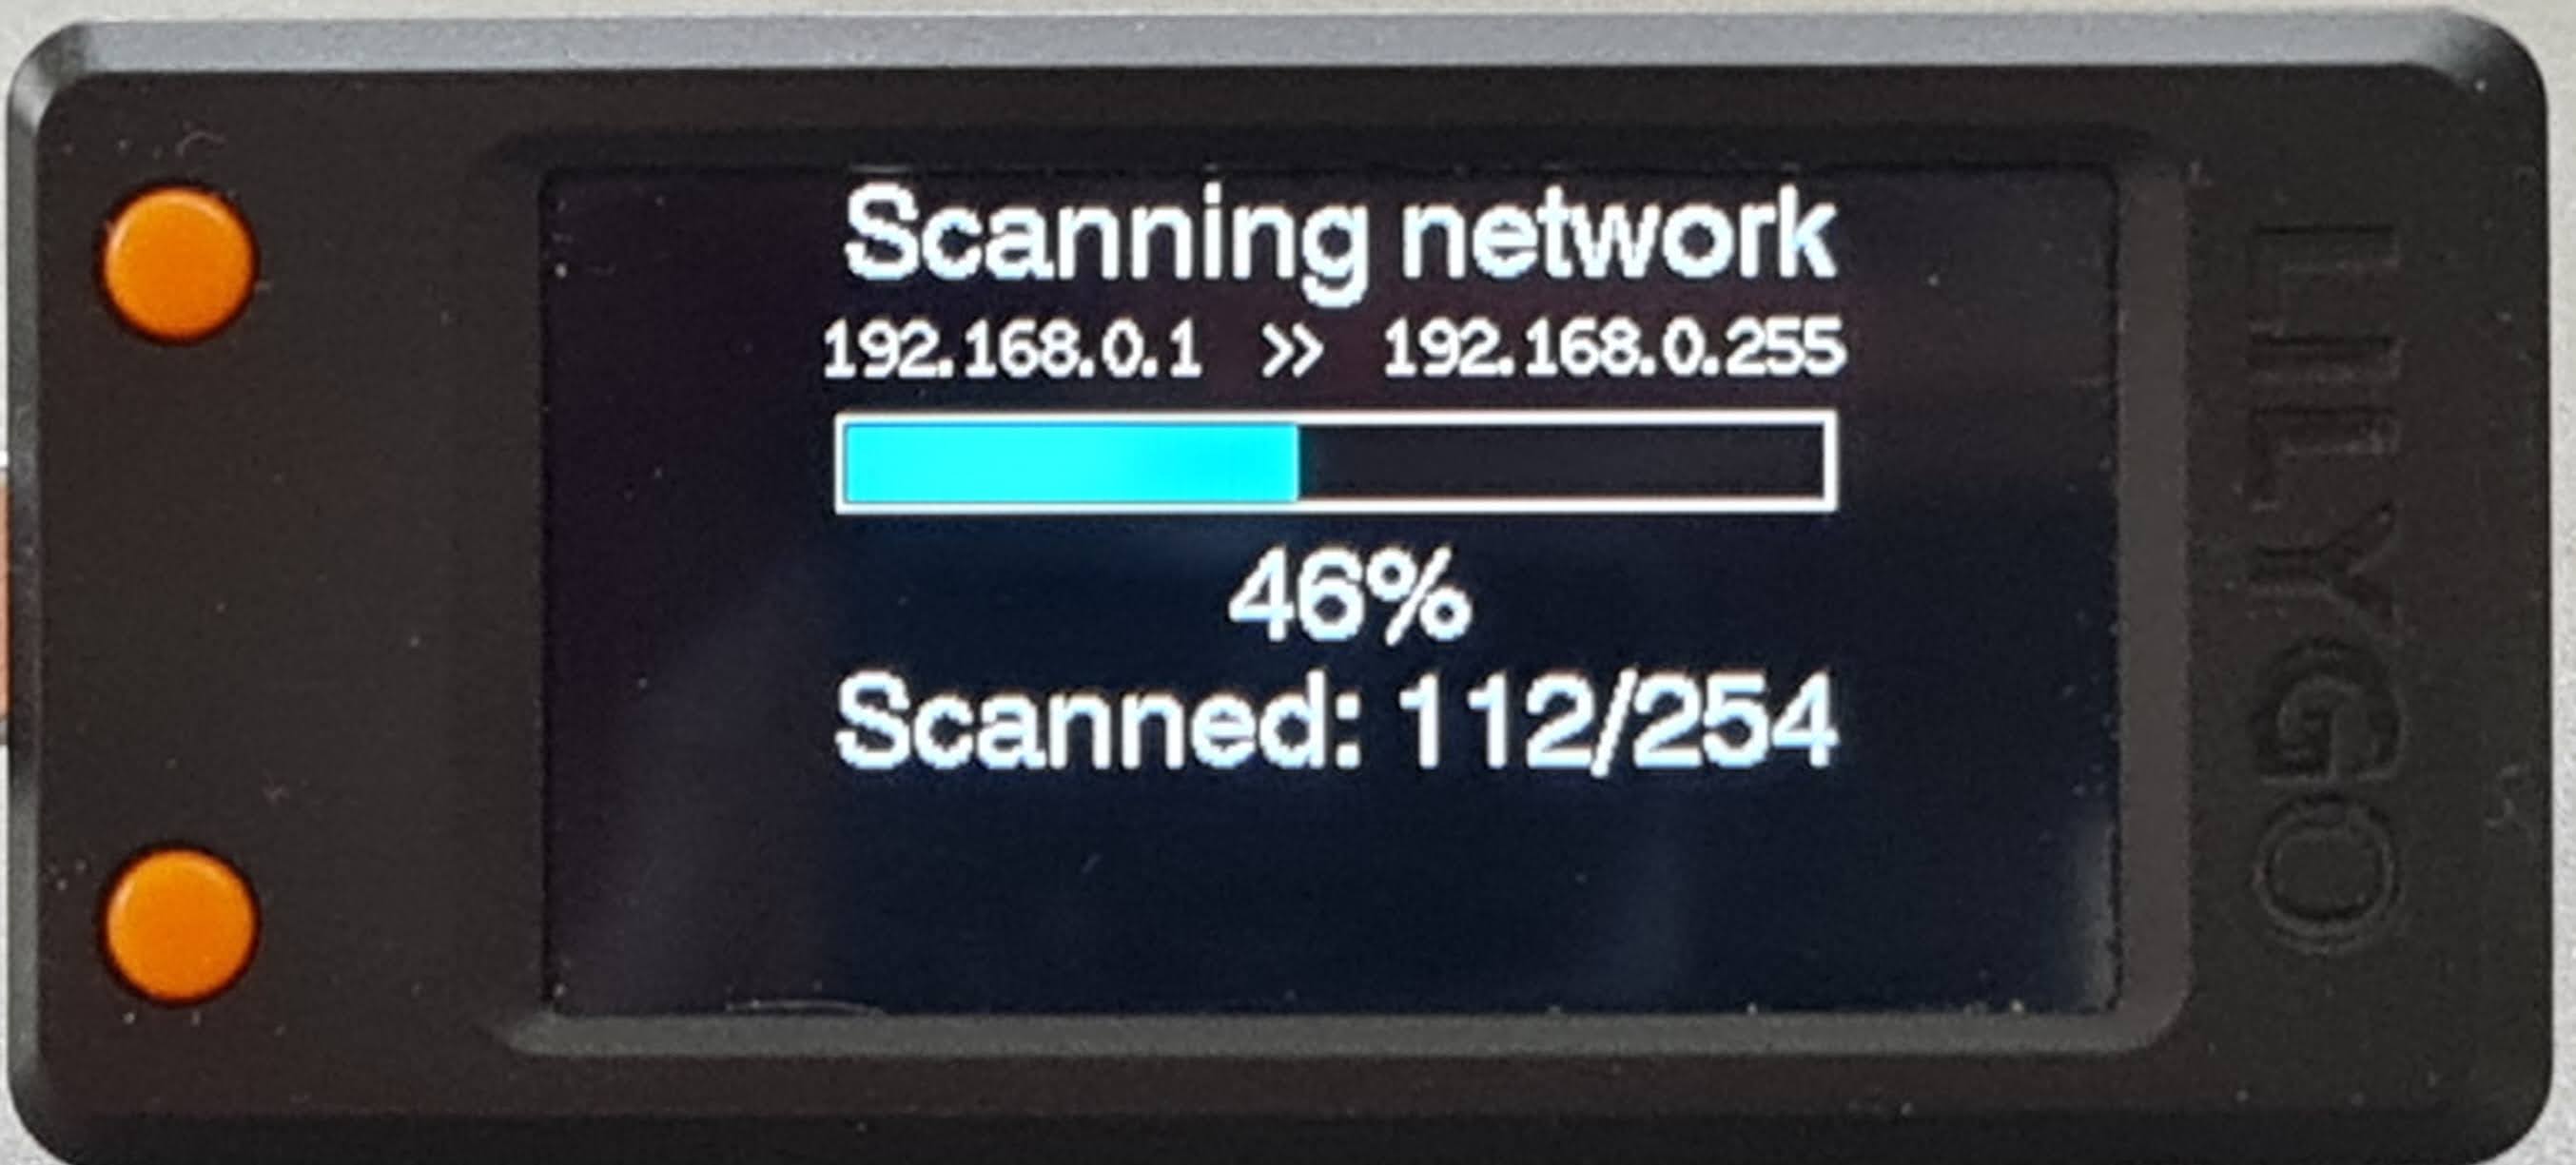
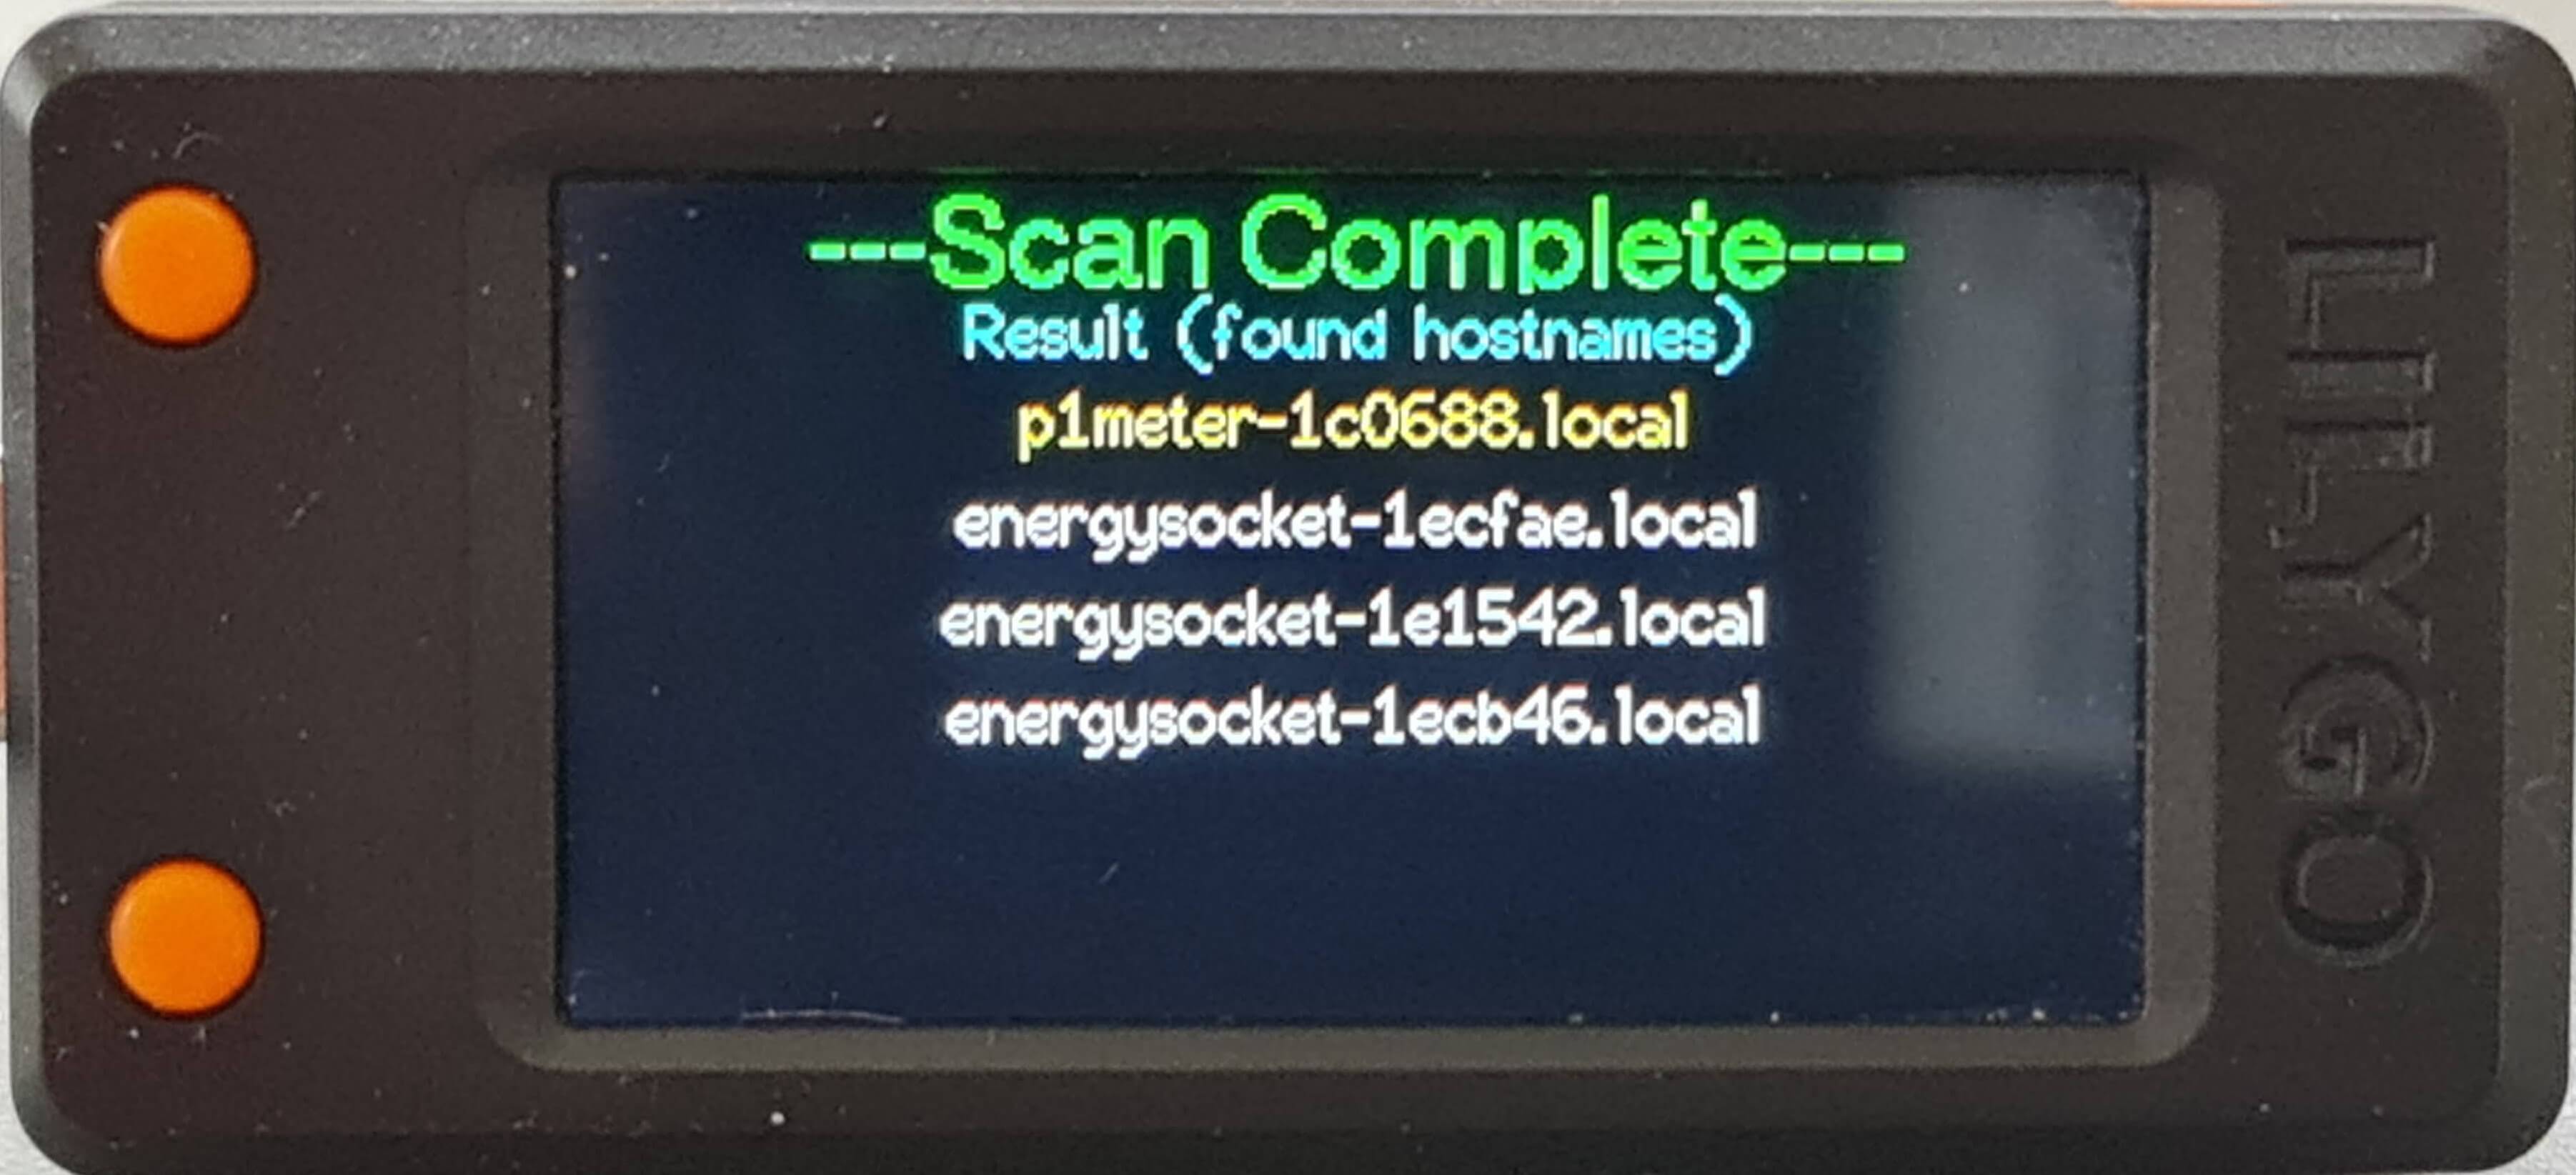
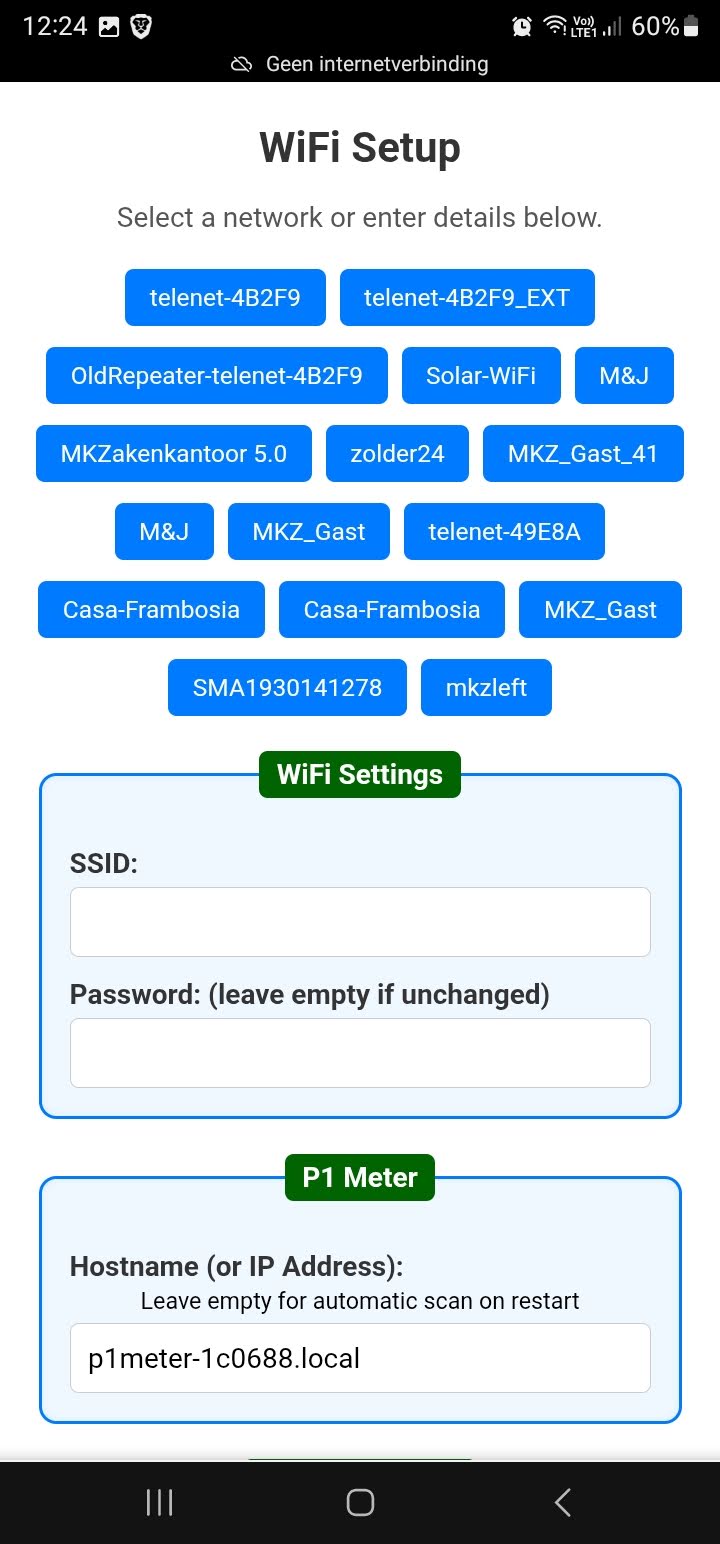
p1meter-123abc.local instead of 192.168.1.x. If the IP address ever changes, you won't need to update anything.
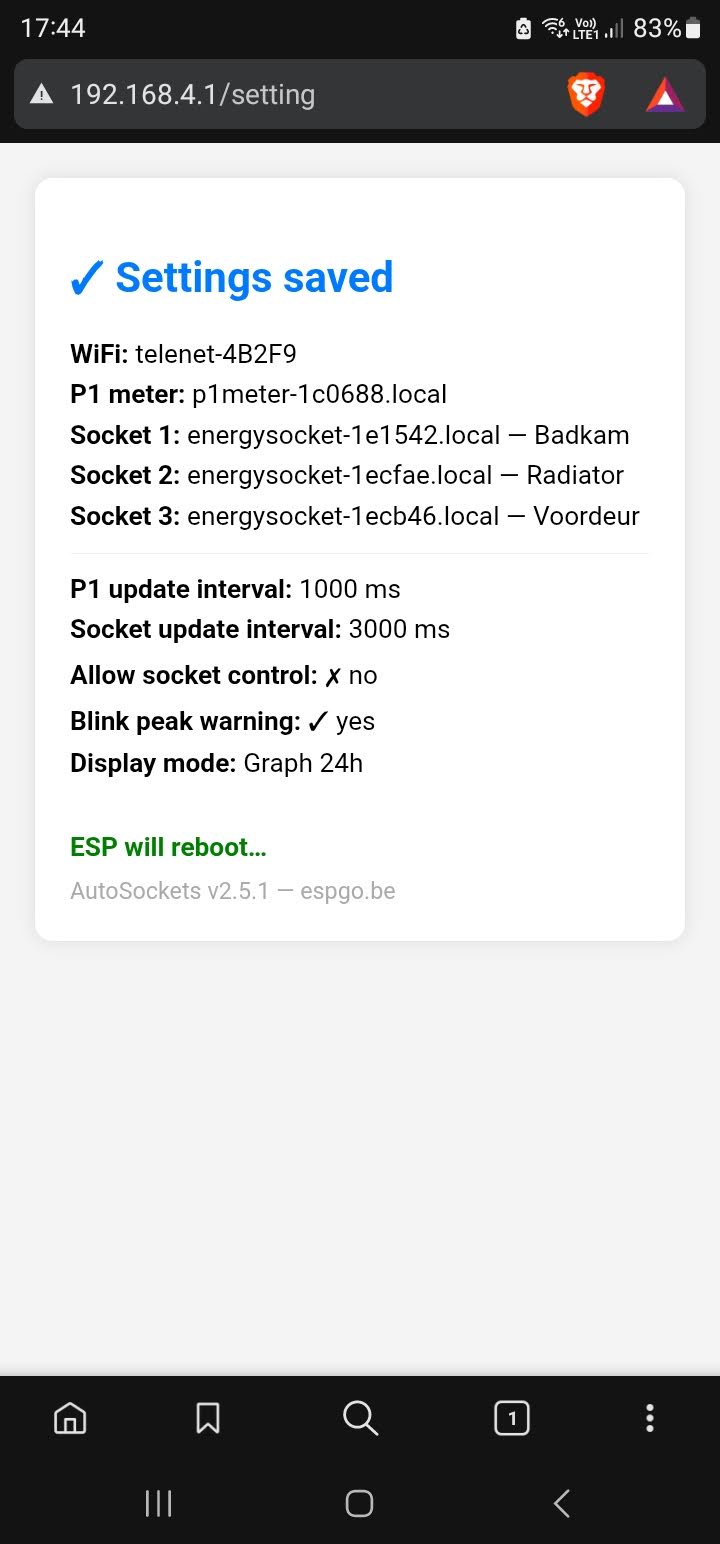
Changing settings later
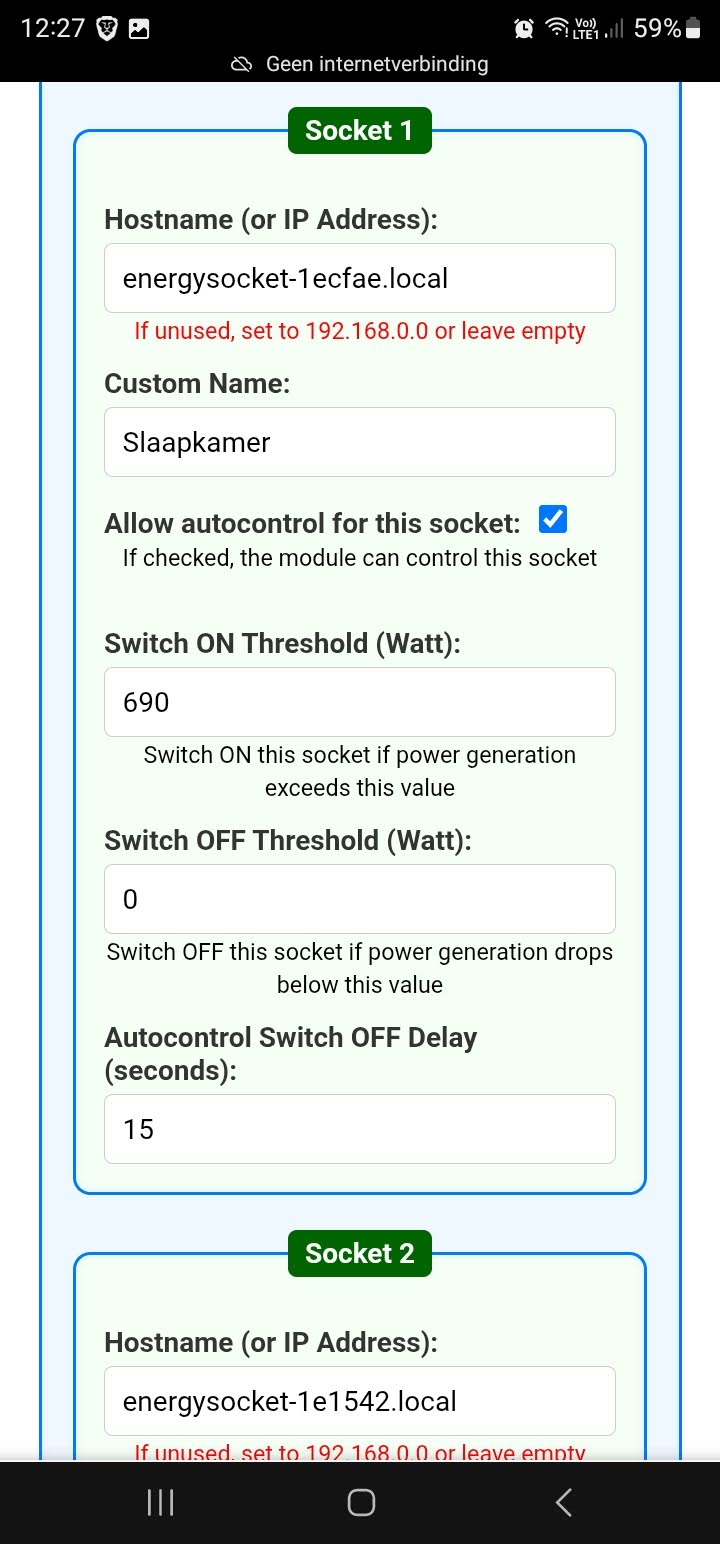
Press the top button for 5 seconds. Turn off mobile data, reconnect to Lily (no password) and open 192.168.4.1. You can then:
- Set the switch-off delay per socket and enter the name of the connected device.
- Set the switch-off threshold (value 0 = requires zero consumption; or higher if e.g. 100W base consumption is acceptable to you).
- Set the switch-on threshold (recommended starting value: 150W — the module adjusts this automatically, but only upward). If you connect a device with a lower power rating than the previous one to the socket, press and hold the bottom button for 5 seconds to reset the thresholds.
- SSID and password of your WiFi, name or IP of the P1 meter and sockets, and update intervals (in milliseconds).
Button overview
LilyGo T-Display & T-Display S3
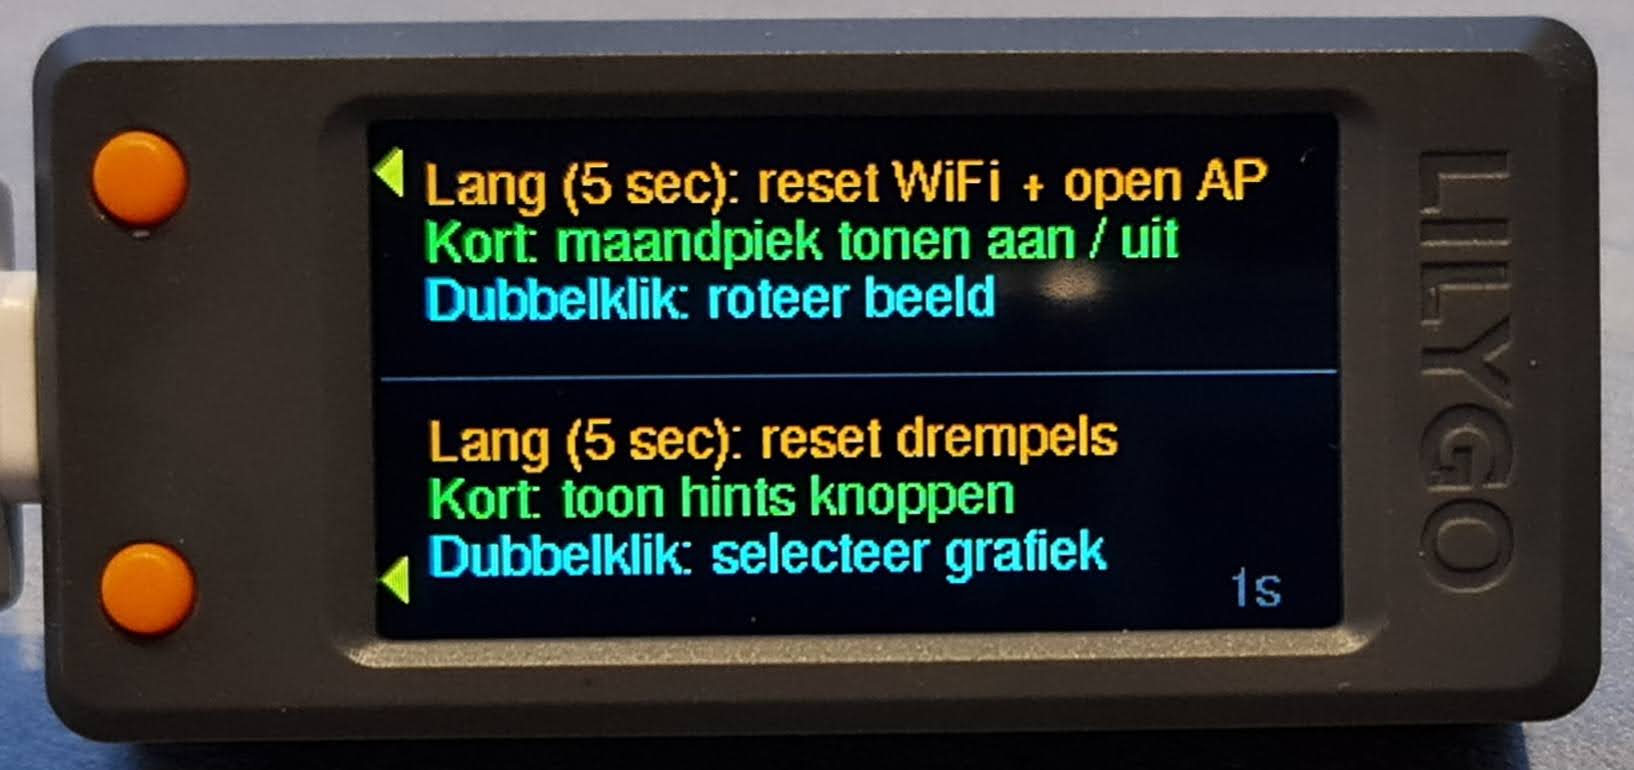
Two buttons. A short press on the bottom button also displays the full button overview directly on the screen for 5 seconds.
| Button | Action | Function |
|---|---|---|
| Top button (FLASH / BOOT) | ||
| ▲ Top | Long (5 sec) | Clear WiFi credentials and restart. The board opens its own access point (name: Lily) so you can enter new credentials via 192.168.4.1. |
| ▲ Top | Short | Toggle monthly peak display on/off. Also shows uptime and the current switch-on threshold per socket for 5 seconds. |
| ▲ Top | Double click | Rotate display 180° — useful when the USB connector is on the other side. Note: after rotating, top and bottom buttons swap positions in this table. |
| Bottom button | ||
| ▼ Bottom | Long (5 sec) | Reset all switch-on thresholds to 150 W. The display briefly confirms with a message. Useful if auto-calibration has set a threshold too high. |
| ▼ Bottom | Short | Shows the button overview on the display for 5 seconds, with an arrow per button and the corresponding actions in colour (orange = long press, green = short press, cyan = double click). |
| ▼ Bottom | Double click | Switch display mode: sockets + peaks → 3-hour chart → 6-hour chart → 12-hour chart → 24-hour chart → quarter-hour projection → back to sockets. The selection is saved and persists after a restart. |
Waveshare ESP32-S3 1.54″
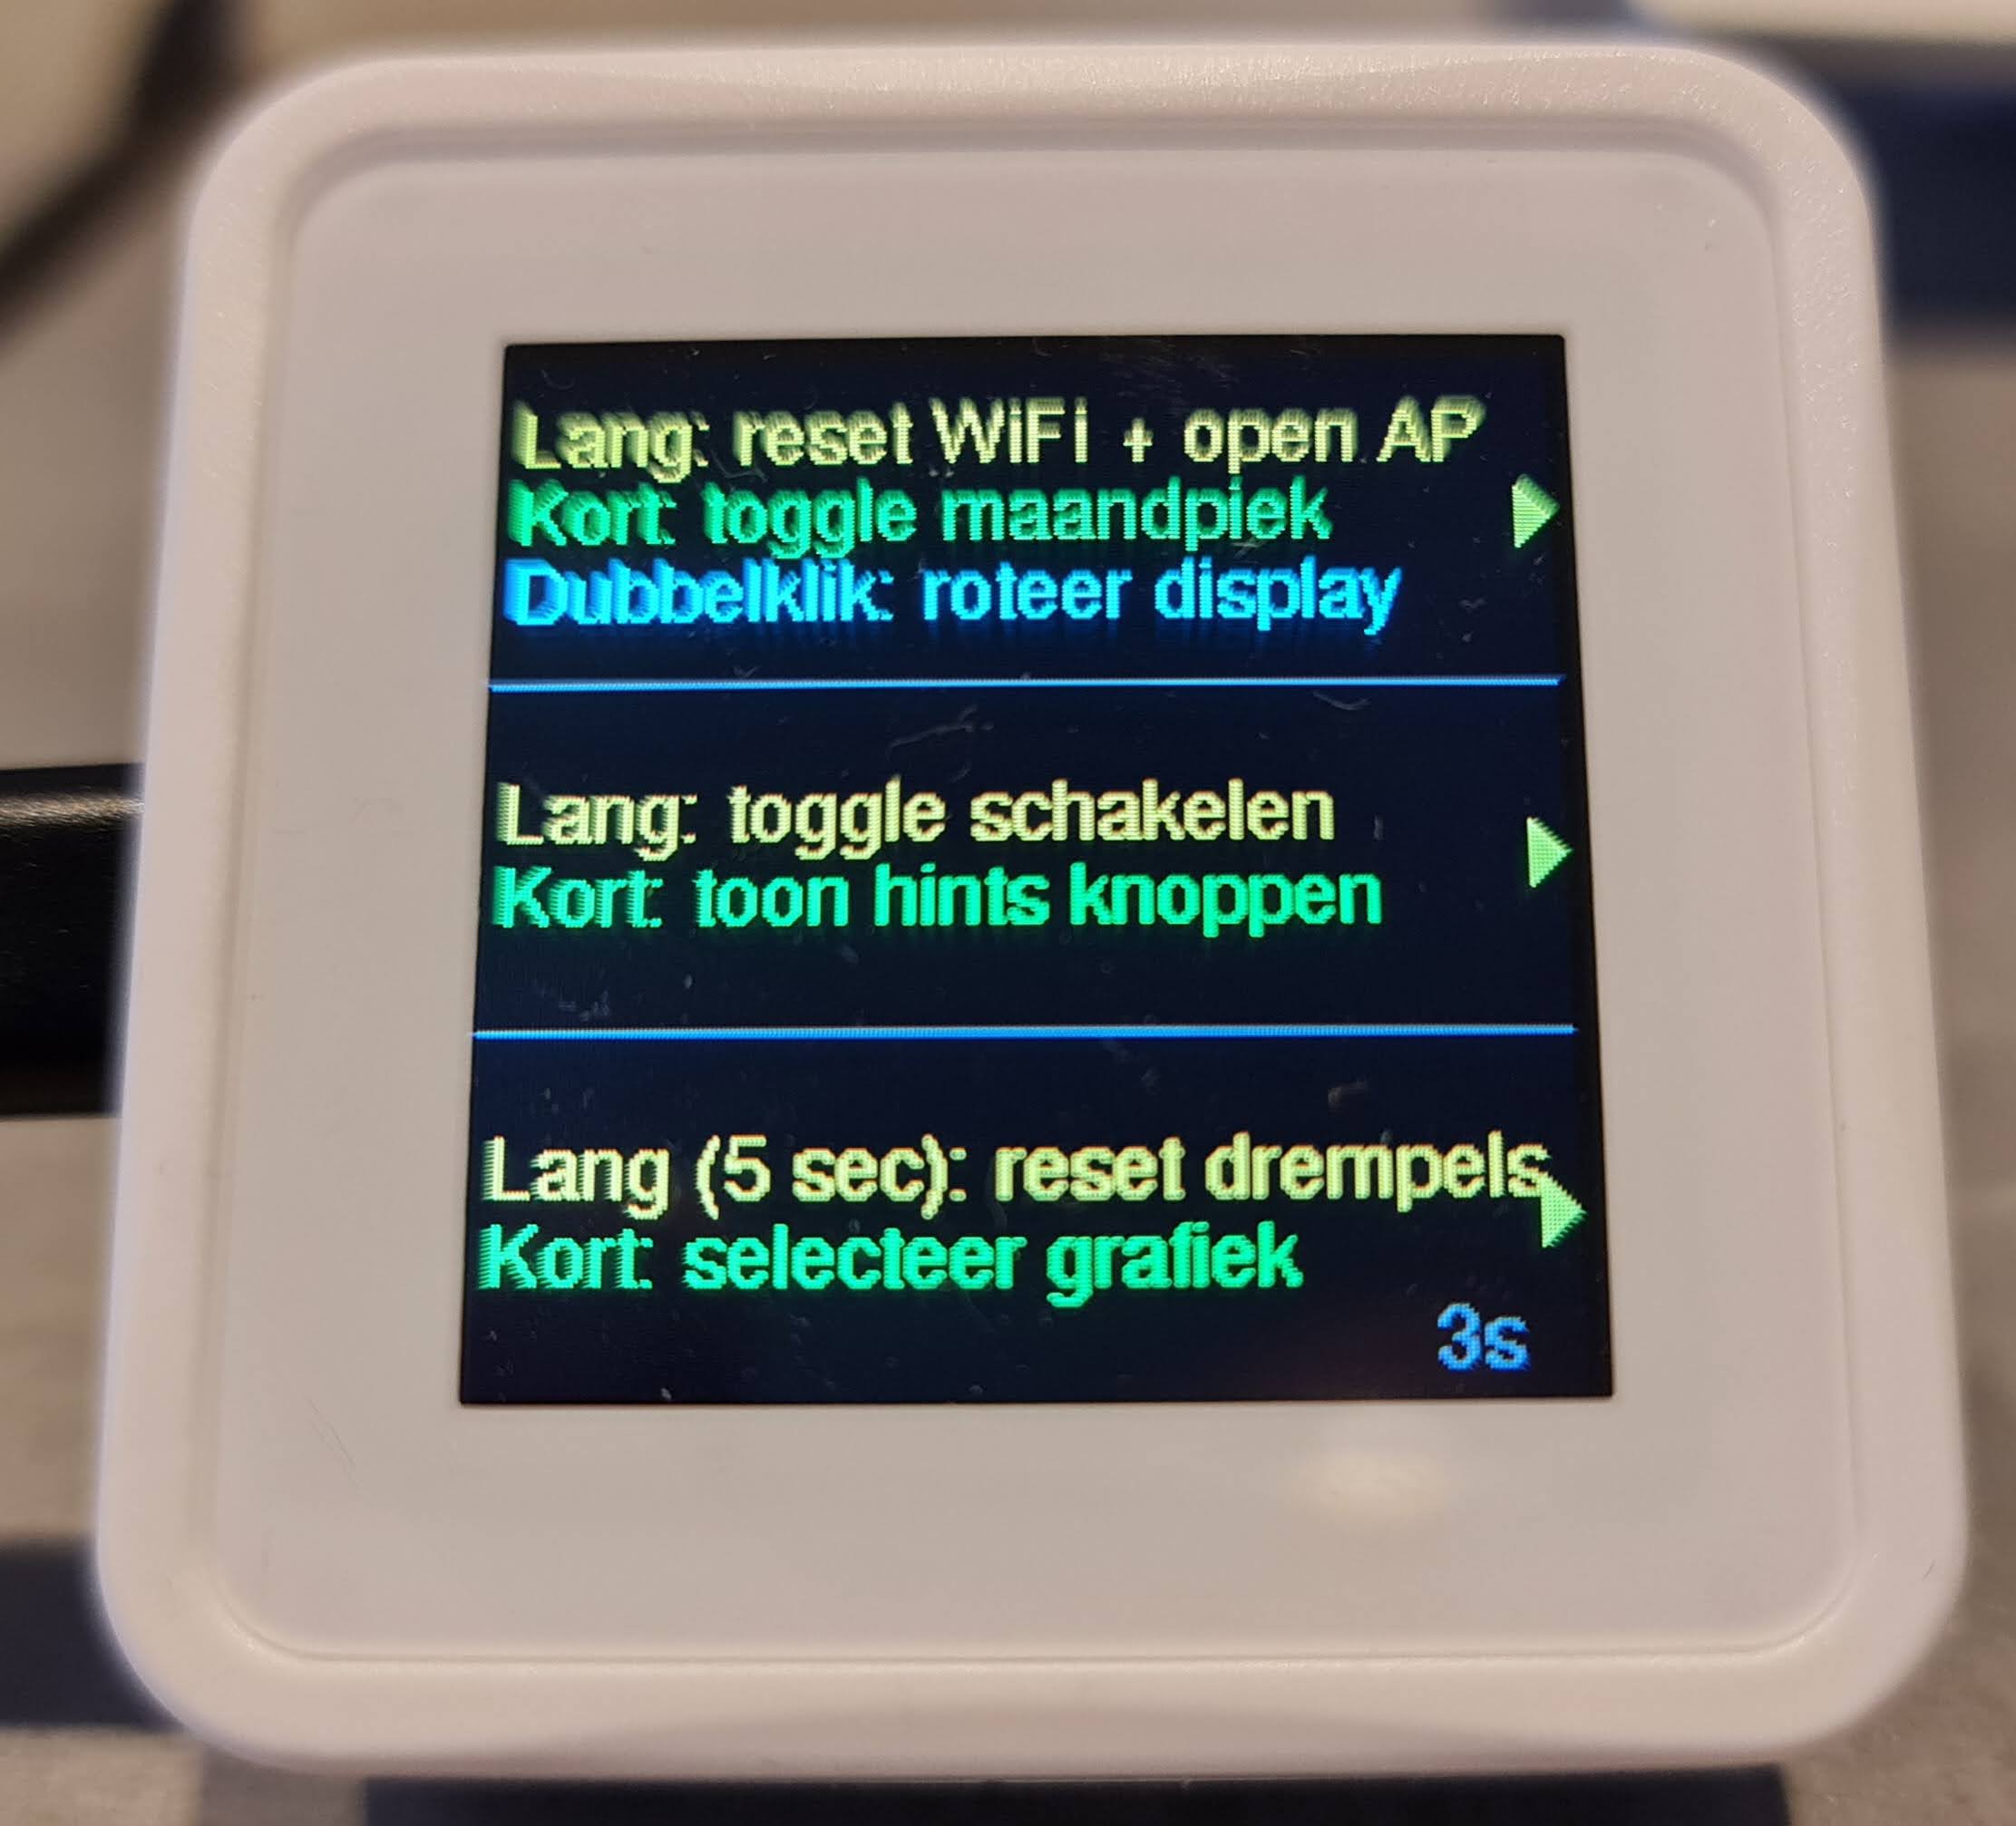
Three buttons. A short press on the middle button (PWR) displays the button overview on the screen for 5 seconds.
| Button | Action | Function |
|---|---|---|
| Top button (FLASH / BOOT) | ||
| ▲ Top | Long (5 sec) | Clear WiFi credentials and restart. The board opens its own access point (name: Lily) so you can enter new credentials via 192.168.4.1. |
| ▲ Top | Short | Toggle monthly peak display on/off. Also shows uptime and the current switch-on threshold per socket for 5 seconds. |
| ▲ Top | Double click | Rotate display 180° — useful when the USB connector is on the other side. Note: after rotating, top and bottom buttons swap positions in this table. |
| Middle button (PWR) | ||
| ⏻ PWR | Long (5 sec) | Toggle automatic socket switching on/off. The current status is shown as a coloured line at the top of the display (green = enabled). On the TTGO and T-Display S3 this setting can only be changed via the web page. |
| ⏻ PWR | Short | Shows the button overview on the display for 5 seconds, with an arrow per button and the corresponding actions in colour (orange = long press, green = short press, cyan = double click). |
| Bottom button (KEY) | ||
| ▼ Bottom | Long (5 sec) | Reset all switch-on thresholds to 150 W. The display briefly confirms with a message. |
| ▼ Bottom | Short | Switch display mode: sockets + peaks → 3-hour chart → 6-hour chart → 12-hour chart → 24-hour chart → back to sockets. The selection is saved and persists after a restart. |
Built-in safety mechanisms
- No connection to the P1 meter? All sockets (controlled by this module) switch off automatically.
- Invalid sensor data? Socket stays off until valid data is available again.
- Consumption too high? Lowest-priority sockets are switched off first.
- Not enough solar? Sockets stay off until the surplus rises above the threshold again.
- Please note: if your local WiFi suddenly goes down completely, sockets that are currently on cannot be turned off by the device. Be aware that such outages may occur; the author of this page is not responsible for unexpected power consumption in this case.
-
Power consumption of the board itself:
- Waveshare 0.76 W
- LilyGo T-Display 0.92 W
- LilyGo T-Display S3 0.95 W
- Written in modern C++ and optimized with FreeRTOS tasks for maximum speed and responsiveness.
- The priority‑driven switching logic ensures smart, predictable and stable control.
- When solar production increases gradually (sunrise, cloud moves away), the lowest‑power consumer switches on first.
- When there's a sudden surplus, the socket with the longest off‑delay gets priority.
- Manual control via the HomeWizard app, curl or the physical button is always possible — the board detects the real state and continues without any hiccups.
- If you manually turn on a socket while there isn't enough surplus, the board will automatically switch it off again.